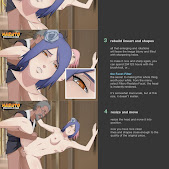
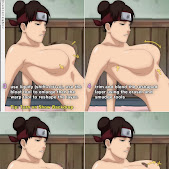
So because of the recent requesting and just how they speak about the editors or edits, I want to shed some light on it. (this is not a tutorial, because I don't go into detail with the program, just the editing stages)
So let me simply put my stages of editing in a list :
1. Look for two Images to combine(sometimes 3 or 4, because of the male or extra hair etc.)
Also, the way I look at it is. I search for a Image that I want to edit(body) and I will find a suitable Image(head) to match it.
2. Put both images in PS and now the first step is to Render/Cut out the head+ hair (sometimes neck).
You can simply learn this by doing tutorials on youtube, it's really not hard after a couple hours of practice.
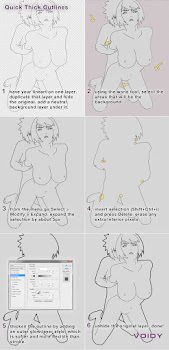
3. Now we have our head cut out from the main image, if you look at the current edits in 420. you will see lots of pixelated edges and awkward cut outs and rough edges. this is because first of all it's not cut out right (probably with the Eraser tool which is the worst way to cut out) I use the pentool to make lines over the lineart(AND YES THIS TAKES TIME!) Tho now I do it reasonably fast because of just doing it for awhile. anyways. so that way the edges will be clean.
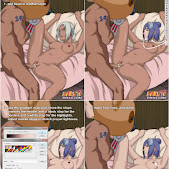
4. Place the head (or save it first so that you don't have to recut it, if you have to use it later again.) in the main image, Ctrl+T and lower it's Opacity to see and adjust the head on the right place you might have to flip around to get it to where you want. Also for example like voidy(and I guess me) if it's possible to recreate pieces of body or hair, sometimes it's possible to do some more original or complicated edits(think of my hinata bj edit). now the head is in place but nearly not good enough.
5. Now we have to clean up the head underneath the new one, do this by selecting pieces or areas that you want to have touched up, so that it won't affect the other parts.(for example if you use smugde you will drag out pixels of the lineart and you don't want that.) simply brush on a low opacity to match the background or just use the stamp tool (sample with Alt key) and cover the older head, do your best to match the background. this part is the trickiest part and often makes the Image what it is, but also it never gets noticed.
6. So it should look like there is a new head on top of the old one, with some hair of the old one sticking out of the neck or just some lines misplaced or too much hair or too much neck of the new one. basically it just doesn't look as one yet. so lower the opacity of the new head and with the pen tool and zoom in super close and cut out all that needs to be cut out. then brush away (zoomed in) things that should be skin.
7. by this point we are already 30-45 minutes into the edit. Now comes the important stage, drawing over the old line art (head and upper torso) , because when cutting out (there will be edges and lines removed or thinned) so I pick a brush (personal preference and my edit secret I guess) that matches the Rex Art, and with the pen tool go over the lines and then brush stroke the penlines by right click etc.
so now there you have it, fine edges and lines, No hard cut, rough, pixelated edges.
8. then I just fine tune it (this is where the editors imagination and understanding comes into play) take for example voidy, he understands the basics and he knows alot, probably through just experience with making other edits(I to myself, did GFX before this.) so voidy wants to recreate a mouth so he does it or pieces of hair etc. I am still trying to get better at that, but it's hard yes.
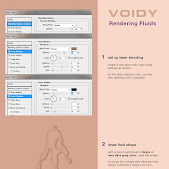
9. Skin coloring, I won't go into detail but one way or another just select the inner skin of the one that you want to change (don't or try not to select the lineart) should just look like youve selected the skin only. then gradient over it with the shadowskintone and normal skin tone of the head. add a marker for highlights and for the lineart. and fiddle with it, slide it till it looks good. and there you have your edit. (basic Edit).
All in all, on average it'll take one hour. and if you include major changes - up to two hours.